Summer in Peoria means triple-digit temperatures, and ceiling fans are one of the smartest ways to stay comfortable without watching your electric bill explode. A properly installed ceiling fan can make your room feel up to 8 degrees cooler and cut your cooling costs by nearly 40%. But the big question is: should you tackle the DIY installation yourself or hire a pro for your ceiling fan project?
How to Install a Ceiling Fan Yourself Safely
The truth is, it depends on your situation. Some installations are straightforward weekend projects for the average homeowner. Others involve complications that need professional ceiling fan installation services. At Bridge Plumbing & HVAC, we’ve handled hundreds of ceiling fan installations across the Phoenix area, and we’ve also helped homeowners fix DIY projects that went sideways.
Why Ceiling Fans Work So Well in Arizona
Ceiling fans aren’t just about moving air around. They work with your existing AC system to circulate air and distribute cool air more evenly throughout your home. This means fewer hot spots, better comfort, and less strain on your air conditioning equipment.
During winter months, you can reverse the fan direction to push warm air back down from the ceiling. This simple trick helps your heating system work more efficiently. Over 25 years in business has taught us that homeowners who use ceiling fans strategically need fewer emergency service calls for their HVAC systems, including repair and cleaning.
What You Need for DIY Installation
Before climbing any ladders, gather everything you’ll need. Missing the right tools halfway through creates frustration and safety hazards.
Essential Tools:
- Sturdy ladder tall enough to work comfortably
- Screwdriver (flathead and Phillips)
- Wire strippers
- Non-contact voltage tester (don’t skip this)
- Power drill with bits
- Adjustable wrench
- Wire nuts and electrical tape
Required Materials:
- New ceiling fan with all parts
- Fan-rated electrical box (supports 50+ pounds)
- Ceiling support brace if needed
- Proper mounting bracket
That voltage tester is critical. It confirms power is actually off before you touch any wiring. This $20 tool could save your life and prevent electrical hazards.
Installing Your Ceiling Fan: The Process
This guide covers replacing an existing ceiling fan or light fixture. If you’re adding a fan where nothing exists, the installation involves running new electrical wiring through walls, which requires hiring a professional electrician.
Turn Off Power and Remove Old Fan
Head to your electrical panel and shut off the circuit breaker for that room. A wall switch isn’t enough because switches can be wired incorrectly. Use your voltage tester on the existing fan or fixture to verify there’s no current flowing.
Carefully remove the old fan or light fixture, supporting its weight as you disconnect the wiring. Look at the electrical box in your ceiling. Standard light fixture boxes only hold about 35 pounds. Ceiling fans weigh 50-75 pounds and create rotational stress. If your ceiling box isn’t marked “fan-rated,” you need to replace it before going further to avoid a serious hazard.
Install the Fan-Rated Box
Check if your current box is already fan-rated by looking for markings on the box itself. If it’s not, you have options. With attic access, you can mount a proper box directly to a ceiling joist. Without attic access, use a support brace that expands between joists.
If you’re uncomfortable working in your attic or don’t have access, this is when you should call Bridge Plumbing & HVAC. Our licensed electrician team assesses ceiling structure and installs proper support quickly and safely. We handle ceiling fan installations regularly for homes and businesses across Peoria.
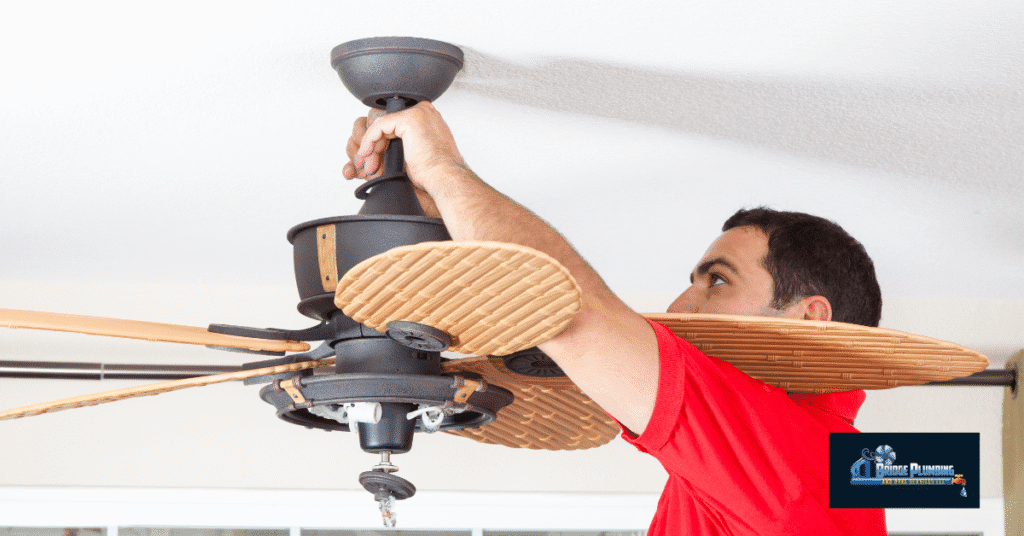
Prepare and Mount the Fan
Assemble what you can on the ground before climbing up. Attach blades to their mounting arms and read the wiring diagram carefully. Having a helper makes this much easier because a new fan is heavy and awkward.
Mount the bracket to your fan-rated box using the provided screws. Make sure it’s tight because this bracket holds the entire fan motor weight. Thread the fan wiring through the bracket’s center, then hang the motor on the bracket’s hook while you work on electrical connections.
Connect the Wiring Correctly
This step requires patience and attention for proper ceiling fan wiring. Your ceiling typically has three or four wires coming down from the existing electrical system. Black is hot (power), white is neutral, and green or bare copper is ground. Sometimes there’s a red wire for separate light control.
Match your ceiling wires to the fan wiring. Black to black, white to white, green to green. If you have a light kit, the blue fan wire typically connects to the black ceiling wire. Use wire nuts on every connection and wrap them with electrical tape. Tuck everything carefully into the electrical box. Incorrect wiring can lead to serious safety hazards.
Warning signs to stop and hire an electrician:
- Old, cracked insulation on your ceiling wiring
- Aluminum wiring (common in pre-1972 homes)
- More than four wires and you’re unsure what they do
- Any smell of burning or melted plastic
Bridge Plumbing & HVAC sees these situations often. Our skilled technicians know how to handle outdated electrical wiring systems safely and bring everything up to current code standards.
Finish and Test the Installation
Secure the canopy to the mounting bracket and attach each fan blade. Work in a star pattern rather than going around in order. This keeps things balanced as you go. Add the light kit if your new ceiling fan includes one.
Go back to your electrical panel and turn the breaker back on. Test every fan speed and the light. Watch for wobbling, which usually means unbalanced blades or loose screws. Listen for unusual sounds. A gentle hum is normal, but clicking or grinding means troubleshooting is needed.
 2")
When to Call Bridge Plumbing & HVAC Instead
Some situations are outside the DIY comfort zone, and that’s perfectly fine. Recognizing when you need professional installation prevents problems down the road and provides peace of mind.
Hire a pro when:
- You need new wiring run through walls or ceilings
- Your ceiling height is 12+ feet or vaulted
- You’re dealing with outdated wiring systems
- You want smart home integration or three-way switch control
- The DIY project feels overwhelming or unsafe
High ceilings create serious safety hazards. Working on a tall ladder for 1 to 2 hours while holding heavy equipment is dangerous. The equipment and expertise to handle ceiling fan installations that Bridge Plumbing & HVAC brings makes installation faster and safer.
We’ve been serving the Phoenix area for over 25 years. Our honest labor costs mean no surprises, and our emergency plumber availability extends to urgent electrical work and HVAC needs 24/7.
Common Ceiling Fan Installation Mistakes That Cause Problems
Even experienced DIYers make these errors. The most dangerous mistake is using a standard electrical box instead of a fan-rated one. Fans have come crashing down because of this, causing injury and damage.
Other frequent problems include not actually turning off the breaker (just the wall switch), installing the fan too close to the ceiling for proper airflow, and leaving too much bare wire exposed beyond the wire nuts. Each of these creates electrical hazards or performance issues. When replacing an existing ceiling fixture, many homeowners underestimate basic electrical requirements.
 3")
Working With Your HVAC System
Ceiling fans and your air conditioning installation from Bridge Plumbing & HVAC work together beautifully. During summer, run fans counterclockwise to create a cooling breeze. This lets you raise your thermostat 4-5 degrees without losing comfort.
In winter, reverse to clockwise on low speed. This pulls cool air up and pushes warm air down from the ceiling. Your heating system works less hard, and you’ll need fewer furnace repair calls because the heat distributes evenly.
Regular HVAC maintenance, cleaning, and repair combined with smart ceiling fan use creates the most efficient home comfort system. We help customers plan whole-house strategies that save money and improve year-round comfort.
DIY vs Professional: Making Your Decision
Installing a ceiling fan yourself works great if you have basic electrical knowledge, proper tools, a fan-rated box, and comfortable working conditions. A basic installation can seem straightforward and you’ll save money on labor costs while gaining useful skills. The fan you want might be perfect for a DIY route if it’s a simple replacement.
But if complications pop up, you’re dealing with old wiring, or the ceiling fan installation might involve complexities beyond basic installation, call in a professional. Hiring a professional ensures safety and proper installation. A licensed electrician provides the expertise to handle ceiling fan installations correctly the first time, preventing future electrical work needs.
Bridge Plumbing & HVAC handles everything from simple replacements to complex electrical upgrades for both residential and commercial properties. An installer from our team brings years of experience to decide the best approach for your specific situation. Hiring a professional electrician gives you peace of mind that the job is done safely and correctly.
Our comprehensive plumbing services and air conditioning installation experience means we understand how all your home systems connect. When you work with us, you’re getting technicians who’ve completed thousands of professional ceiling fan installations across Peoria and surrounding areas.